
If you’re using Adobe Audition and have not yet discovered (or taken advantage of) Keyboard Shortcuts, let me tell you right now… you’re missing out!
Talk about a time saver. For the few minutes it takes you to set them up, you’ll gain back hours of your life (not scientifically verified) during the editing process.
I’m currently using CS6 for Mac. This quick little step by step guide will take you through the process. Here’s hoping it’s the same for PC. If not.. buy a Mac. 😉 (That was a joke… please don’t send me angry emails!)
Setting Up Keyboard Shortcuts Step 1
Under the Edit Menu, scroll down to the bottom. You’ll see Keyboard Shortcuts.

Step 2
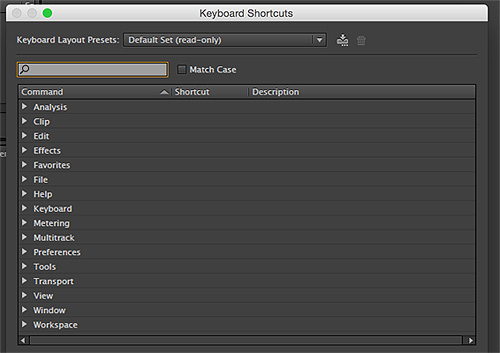
A new window will pop up. From this window you’ll see all the various menus you can choose functions from. For me, I previously went through and set my most used functions as Favourites. This made finding them and setting shortcuts for them very quick and easy.
 Step 3

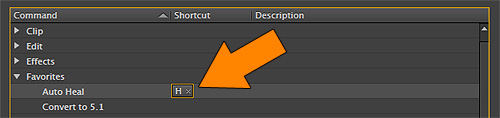
Once you’ve found the function you want to set a shortcut for, simply click in the empty space under the Shortcut heading and type the key (or key combination) you want to use. In this example, I’ve set H for Auto Heal.
 Step 4

Repeat step 3 over and over until you’ve set all the shortcuts you want. I played around with mine and tried to group my main ones onto close keys to make it even easier. I also tried to make it somewhat intuitive so I could remember them.
A few examples…
- Auto Heal – H
- Processing for my voice – V
- Brush Tool – B
- Normalize – N
Play with the keys and find something that works for you. Once you’re all set up, it’ll be happy editing indeed!
If you need a little extra help getting yours set up, comment or send me an email. I’d be happy to talk you through it. marc@marcscottvoiceover.com